It’s an amazing bridging solution from Ubiquiti. It’s all good, but there are some cons:
- Poor documentation from Ubiquity
- Difficult and time-consuming to aim
- Almost perfect Line of Sight is required
- Sometimes you need to do factory reset to get a good signal
But once you have aligned it with the other pair, it will not fail or in other words signal will be stable. An important sidenote to learn here is that, an Airfiber 60 LR will only work with an Airfiber 60 LR. You can not pair a Airfiber 60 LR with any other wireless radio system. So anytime you need to use an Airfiber 60 LR, you need to order 2 pieces. One side will be the AP and the other side will be the station.
How to access Airfiber 60 LR:
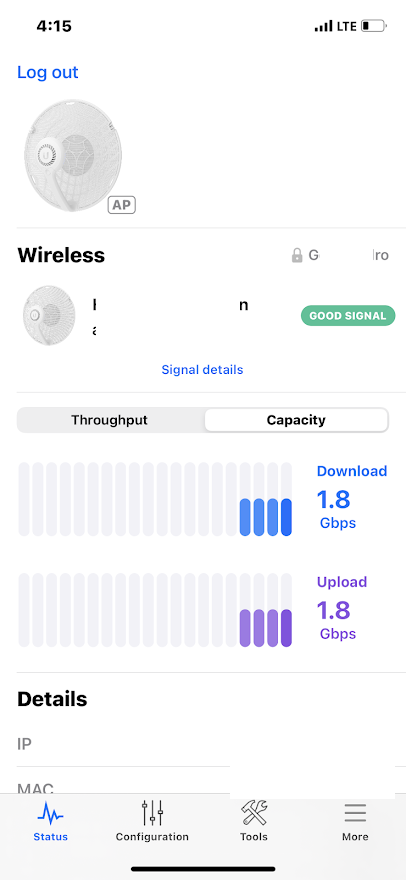
- Using mobile app:
- Power on the Airfiber 60 LR
- Download UISP app on your phone
- Turn ON Bluetooth on your phone
- Open UISP app and let it discover all the available devices nearby
- Once you found your device, just connect and will be able to configure 99% of the configuration on this device. The exception is the username. To change username, you need a cable connection to the device.
- Using a Laptop:
- Power on the Airfiber 60 LR
- Default IP of Power on the Airfiber 60 LR 192.168.1.20/24 so change your computer IP to 192.168.1.30/24 or something else within the subnet of 192.168.1.0/24
- Open a browser tab and enter 192.168.1.20, and you will see the setup wizard
Configuration basics: There’s nothing much to configure here
- Change the username and password of the device
- create a SSID & password (this should match on both side, otherwise AP & station will not pair with each other)
- I highly recommend turning ON “WAVE AI”. This feature allows the AP to change frequency depending on the environmental noise.
- Turn ON MASTER mode on the Airfiber that is closest to the internet side. Master mode is basically AP mode. That means the Master device will only advertise the SSID. Master device will not pair with a device that is also Master.
- Turn OFF MASTER mode on the Airfiber that is closest to the client side. Turning OFF Master mode makes an Airfiber to like a station. A station will only pair with a Master whos SSID&Password matches with its own.
- You can change the management IP, gateway, DNS etc. These values are required if you want to do remote management. If not, then don’t bother. These values have no impact on the traffic that the Airfibers are going to carry. In my deployment I did not change these values, I left them at default because I will not be monitoring them remotely.
Alignment / Aiming Airfiber 60 LR:
Always install the aiming tool behind the dish on the top socket and not on any other socket. The aiming tool should have a tight fit on the socket. After installing the aiming tool on the dish, it should look like this:

When to use Airfiber 60 LR:
- When Line of Sight is certain and clear of any obstruction
- when you absolutely need speed of 1Gbps or more.
- Otherwise, use some other products or lower frequecy like 24GHz/11GHz or 5 GHz
The way you broke down the entire procedure is really helpful, it was understandable even for a completely novice like me.
The alignment part is pretty interesting though!
Thanks Tayeeba. Glad to hear that 😀